In multiphase simulations, how can I add two materials to my computational domain? Furthermore, how can I configure the material initialization for my simulation?
This article will elaborate on the workflow for these queries in detail.
Defining Materials
Multiphase analyses are different from other analysis types, in the sense that we must define two fluid materials in the setup. The process is simple – the user creates two fluid materials and assigns them to the same volume. Let’s go through an example for a waterfall multiphase project, where both water and air are present:
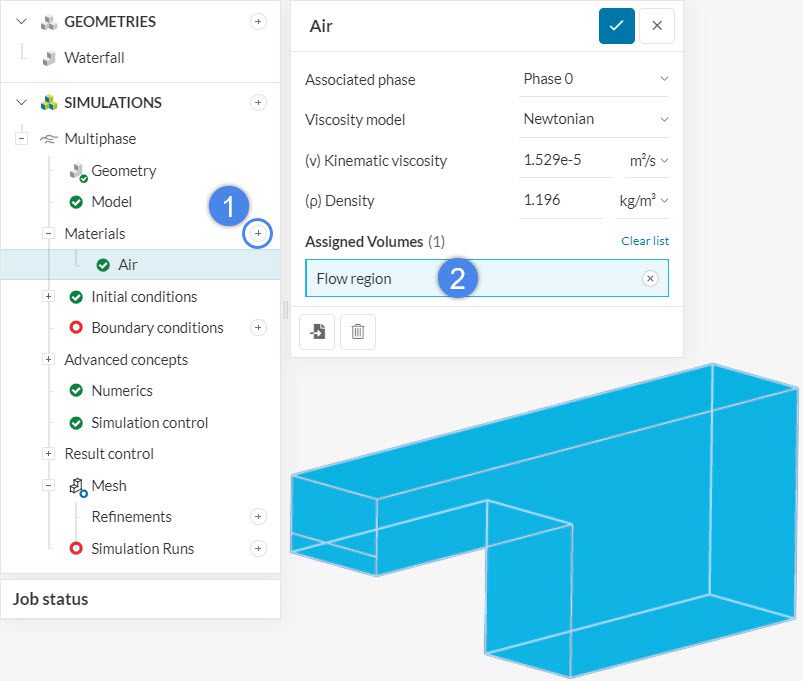
Therefore, let’s first assign air to the computational domain, with the steps below:
- By clicking on the ‘+ button’ next to Materials, we select a new material for our project
- The flow region volume is assigned to Air
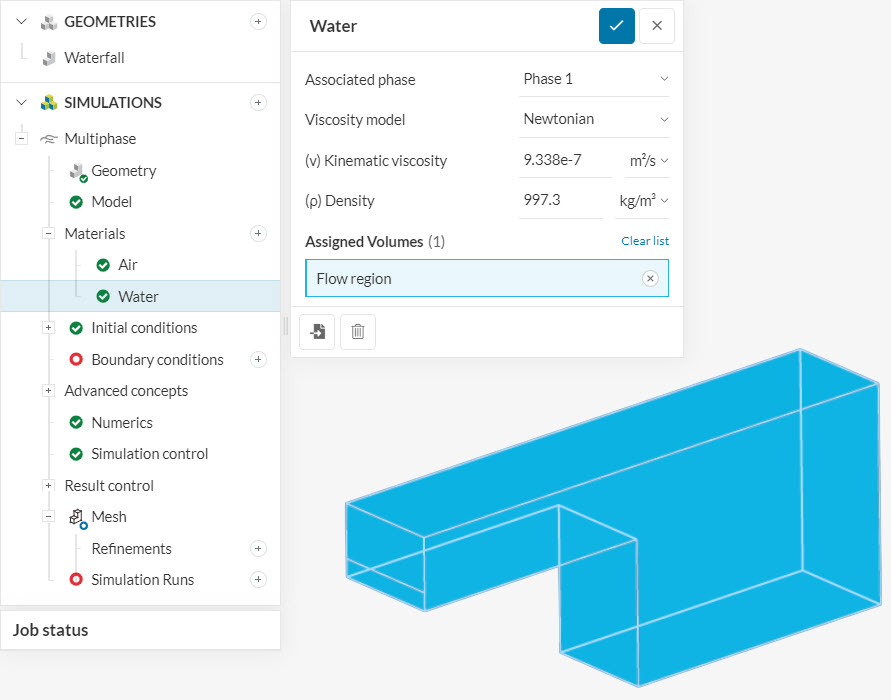
Following the same process, we define our second material to the flow region:
It is important to note that the flow region always has two material assignments in multiphase projects.
In figures 2 and 3, notice how each material represents a different phase: 0 for air, and 1 for water. These values are important for the initialization of the domain, and also for the boundary condition configuration.
Domain Initialization
To initialize the computational domain with a particular material, please navigate to Phase fraction under Initial conditions. The objective of this step is simple: the user needs to define what regions of the domain are initialized with Phase 0 and Phase1. In this example, 0 represents air, and 1 represents water.
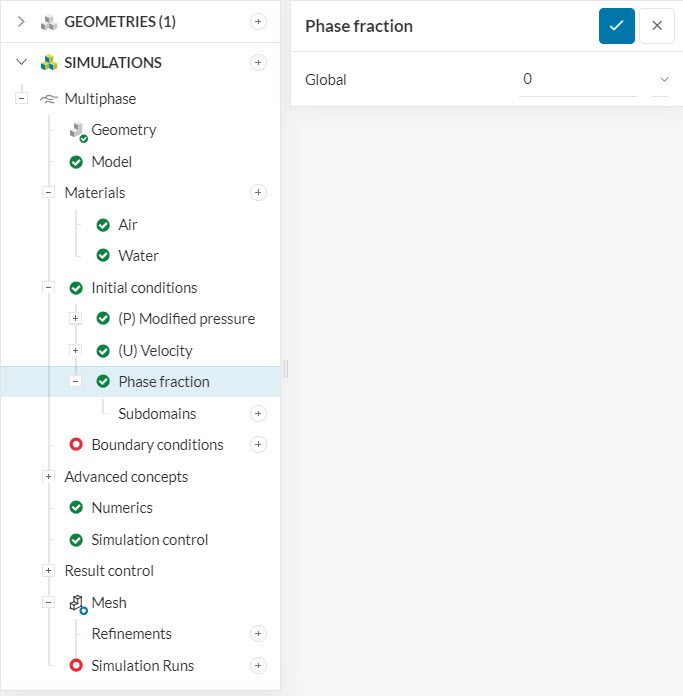
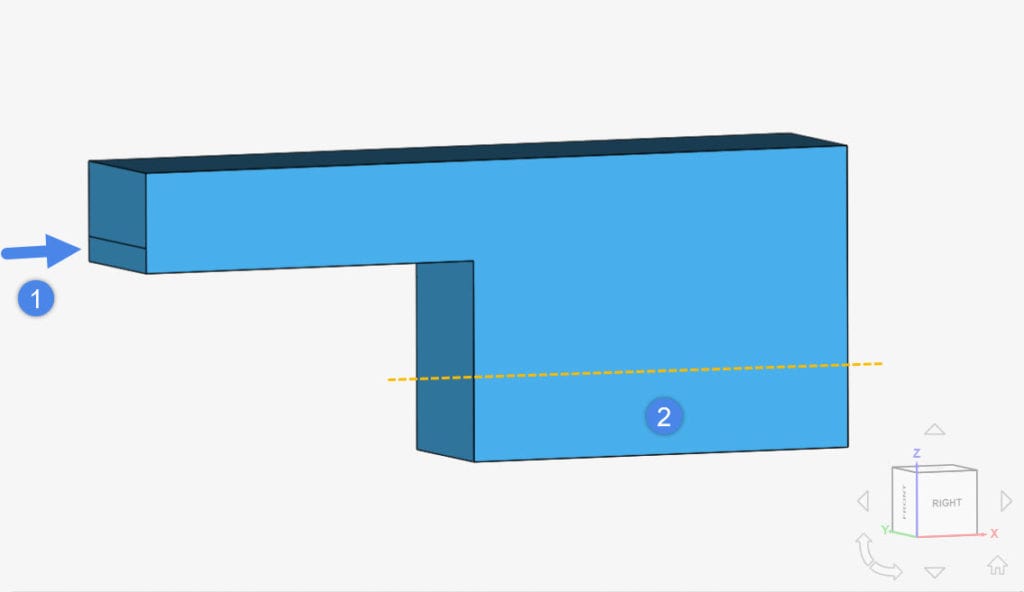
For a global initialization, the entire domain receives the same phase value. There is also an option to create Subdomains, which overwrites the global initialization. With Figure 1 in mind, we can initialize the domain globally with air (0) and use a subdomain to initialize the small pool of water (1).
For the subdomain initialization, it is possible to either assign volumes or geometry primitives – see more details here. In our case, a geometry primitive is the only option:
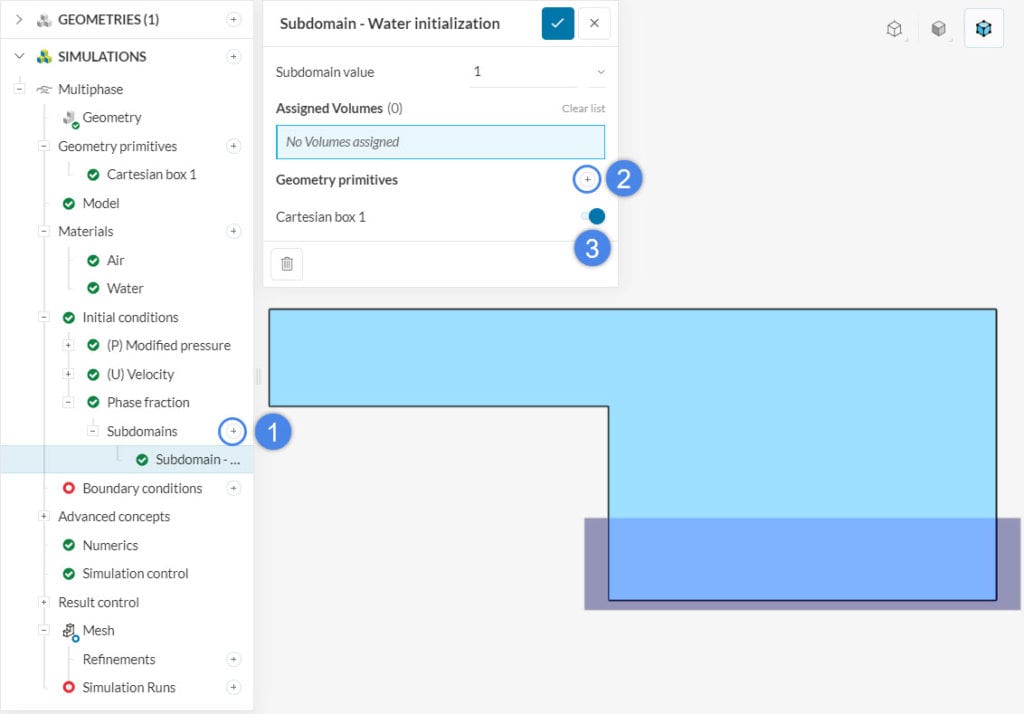
In conclusion, by creating a geometry primitive with the appropriate dimensions, we initialize the domain with the phase fraction of interest.
Did you know?
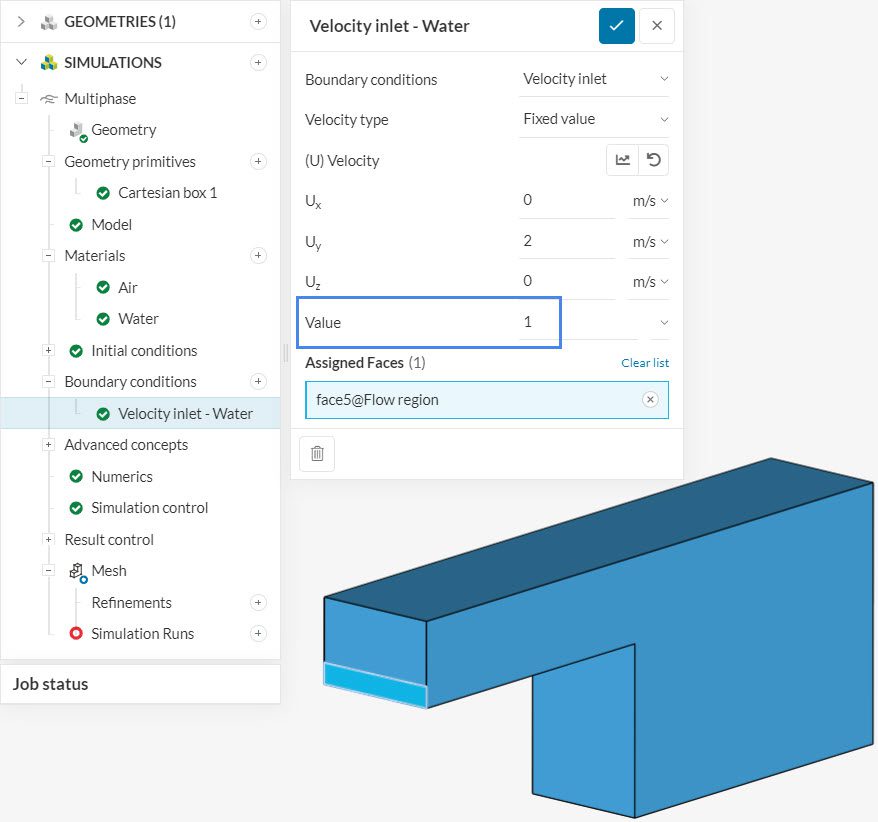
The phase nomenclature is also useful for the boundary conditions. By using 0 or 1, you can tell the algorithm what material is flowing through the boundary:
As an important note, we should always use 0 or 1, and never fractions like 0.5.
Expected Outcome
As a result, we have the correct physics of a waterfall, as in the video below:
